Foothill College – Summer 2011
PHOT 68B.01 Digital Topics in Photography
Large Format Black & White Digital Printing Workshop
Instructor: Lesley Louden
1 unit Short Course (For Price – Go to Foothill College)

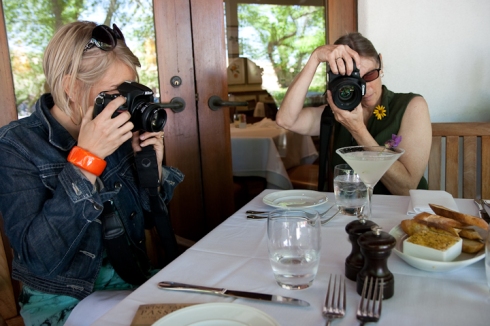
from “Evelyn: Nothing Fancy” © Lesley Louden
In this workshop we will explore various black and white aspects of digital imaging. This will include special experimentation of color to black and white digital conversions and sharpening methods with Digital RAW files in Adobe Photoshop. Then we will prepare our files for large format printing on our Epson 4880, 3880, 3800 printers. Various fine art and traditional papers (larger print sizes 11×17, 13×19, 17×22), known for their attributes in printing black and white images, will be utilized to achieve the beautiful larger format black and white digital prints.
Contact Lesley Louden for more information: loudenlesley@foothill.edu
SCHEDULE:
Thursday, June 3oth, 6pm-7pm – Foothill College – Room 6107 or Studio
Saturday, July 16th, 9am-4pm – Foothill College – Room 1211 – Idea Lab
-Online Tutorials & Demos. will be presented for creating B&W images.
Final Crit. – July 26th, 6pm-8pm – Foothill College – Room 6107 or Studio
- More Information for Workshop:
First Meeting: Thursday, June 3oth, 6pm-7pm – Foothill College – Room 6107 or Studio
• B&W Conversion Demonstration & Paper Option Sharing:
The first meeting will include a B&W Digital Conversion demonstration (also available as an online tutorial for your later viewing) and paper type sharing as well as information concerning our printing workshop day. I will be showing my favorite paper-type examples for B&W digital printing at this first meeting. This will help you decide which paper to purchase based on what you want to try printing on and the imagery you are working with.
* At first meeting you may want to find out if anyone wants to share a box of paper with you or swap a sheet or two with you to be able to try various paper types.
Independently Before Next Workshop Day:
TO DO LIST:
• Convert Images to B&W Prior to Workshop Day Based on Demo. from first meeting & Online/Digital Tutorials: Online Tutorials will be given to you with the instructions for converting your images to B&W in Photoshop. You will then convert your images (4 Images, any of your choice) to black and white prior to our Saturday printing day in the lab (it is best if you have all conversions complete by the day of the workshop). If you do not have Photoshop, you can download the 30 day trial for converting your images to B&W at home on your computer.
• Purchase Paper @ Keeble & Schuchat in Palo Alto, Monterey Bay Photo-Supply in Santa Cruz, or Online through Amazon or Adorama (11×17, 13×19, or 17×22 paper)
- Update your Foothill College Student ID OWL Card OR get a Foothill Student ID OWL Card from the Smart Shop on Campus (Campus Center Room 2016 – Hours for Summer Quarter: Monday – Thursday 8 a.m. – 5 p.m. Friday: Closed) – Then load money (Cash only – at least $6) onto your Student ID Card in the library or student center so that you can print images in the Idea Lab on our workshop day (About $2 a print, for larger prints). http://www.foothill.fhda.edu/campuslife/smart.php
• Bring images to work-on, for while you are waiting your turn to print. We will be utilizing four different large format printers in our Lab and we will each be printing one image at a time. So, it is to your benefit to have other things to work-on in the lab while you are waiting for your printing slots (we have 30 mac computers in our lab for use).
• Print out Epson Printing Handout that I will give you prior to our workshop day and bring it to class.
Workshop Day: Saturday, July 16th, 9am-4pm – Foothill College – Room 1211 – Idea Lab
• Instructions will be given on loading larger fine art papers and the proper print settings for Black & White Digital Printing on Epson Larger Format Printers
• Main Focus of Workshop Day is printing, however, assistance with B&W Digital Conversions of color files in Photoshop will be possible.
• Printing all day in lab
* Bring lunch with you as nothing will be open on-campus that day.
*Bring projects/images to work-on while you are awaiting your slots to print! We will have four printers running for at least 6 hours.
Critique Day: Final Crit. – July 26th, 6pm-8pm – Foothill College – Room 6107 or Studio
• DUE: One B&W Print: 17×22, 11×17, or 13×19 Prints (not mounted or matted, just loose prints – (with printer name, paper type, any special settings written on back edge of paper)
– These may be prints you made the day of our workshop OR prints you make at home after our printing workshop day (or even larger ones from Costco for comparison if you like).
Questions about B&W Conversion Workflow:
Dodging & Burning Techniques:
- DODGING/BURNING TECHNIQUE QUESTION: Non-Destructive Which is a more effective method for dodging and burning? Using Method #1 (Layer>New Layer>Overlay, X Fill 50% Gray w/ Brushes) in B&W Conversion Handout OR using Curves Method #2 (see Two techniques here: Using Curves to Dodge/Burn Option#1, when using this Curves Technique, be sure to make Blend Mode on Curves Layer: Luminosity as to not alter the color of image when D&B, OR Using Curves to Dodge/Burn Option #2-Faster Technique) ANSWER: Sorry, there really isn’t one answer here. It depends on your image and the time you have. I find it faster to use the Overlay and Fill 50% gray. When using Curves Technique #1, it takes some time but with the Luminosity Blend Mode set, you won’t alter the color of your image. I also like the impact of the “S-Curve” for contrast in this method. With Method #2 for Curves you will get some color saturation when you Burn).
- TIP for Dodging and Burning for Method #1 – You can now use the Dodge & Burn tools (instead of Brushes) to Dodge/Burn on your Overlay, 50% Gray Layer (used to be that D&B tools would paint with color or gray, they improved that). For Range in Options Bar, typically you will concentrate on the midtones. Keep Exposure low, at 5%-30% or so. This technique is not as dramatic as when you use Paint Brushes and it can be good for Dodging/Burning Faces. Zoom into 300% for more control on smaller areas. Zoom out often to see entire image.
- TIP for Dodging & Burning for Method #2 w/ Curves – when using Curves Technique, be sure to make Blend Mode on Curves Layer: Luminosity as to not alter the color of image when D&B
B&W Adjustment Layer:
- Using the Hand or Target Adjustment Tool (Hand Icon) in B&W Adjustment Layer: It is just fine to do this, just try not to go to extremes with the sliders as that is what really will harm your image. You can get harsh transitions between areas, banding. To avoid this, keep your eye on the image as you drag the sliders or hand. Leave your Histogram Palette open as you drag the B&W sliders to make sure you aren’t clipping (or losing information) in your image. See bottom of this page: “Keeping an Eye on the Histogram”.


